- 1. Documentation
- 2. Documentation
-
3. JS Jobs
- Basics
- Configurations
- Company
- Job
- Resume
- Job Apply
- Credit System
- Credits Log
- Credits Pack
- Purchase History
- Login & Register
- Applied Resume
- Fields
- Custom Fields
- Message System
- Categories
- Data Dictionary
- Users
- Salary
- System Emails
- Address
- Tags
- Reports
- Shortcodes & Widgets
- Job Alert
- Department
- Cover Letter
- Folder
- JS Jobs RSS
- Translations
- Miscellaneous
- Slug
- Errors
-
4. JS Support Ticket
- Basics
- Configurations
- Ticket Via Email
- Tickets
- Staff Member
- Departments
- Knowledge Base
- Downloads
- Announcements
- FAQ's
- Roles
- Priorities
- Categories
- Premade Messages
- Help Topics
- Field Ordering
- Feedback Fields
- Export
- Feedbacks
- Reports
- Miscellaneous
- Support Area
- Breadcrumbs
- Permissions
- Time Track
- Push Notifications
- 5. Jobi
-
6. JS Car Manager
- Basics
- Settings And Customization
- Vehicle
- Credit system
- Credits Log
- Credits Pack
- Purchase History
- Login & Register
- Fields
- Custom fields
- Make And Model
- Data Dictionary
- Users
- System Emails
- Address
- Reports & Stats
- Visual Composer
- Vehicle Alert
- JS Car Manager RSS
- Translations
- Miscellaneous
-
7. JS Job Manager
-
Basics
- Installation
- Job Manager Admin Dashboard
- Job Manager Home Page
- Custom Homepage & Widgets
-
Homepage & Widgets
- Job Manager Pages
- Job Search
- Jobs By Category
- Latest And Featured Jobs
- Count Box
- Latest Resume
- Pricing Tables
- Latest News And Blogs
- Testimonials
- Companies
- Job Manager Info Text
- Newest Jobs
- 4 Box Style For Job Category
- 3 Box Style For Featured Box
- Job Manager Link With Counter
- Google Map
- Image & Text
- Search With Categories
- Team Members
- News & Rumors
- Price Tables
- Team Members
- Testimonial
- System Requirements
- Uninstall
- Theme Sample Data
- Theme Options
- Configurations
- Company
- Job
- Resume
- Job Apply
- Credit System
- Credits Log
- Credits Pack
- Purchase History
- Login & Register
- Applied Resume
- Fields
- Add Fields
- Message System
- Categories
- Data Dictionary
- Users
- Salary
- System Emails
- Address
- Tags
- Reports
- Shortcodes & Widgets
- Job Alert
- Department
- Cover Letter
- Folder
- Job RSS
- Update
- Translations
- Miscellaneous
- Slug
-
Basics
-
8. JS Learn Manager
- Basics
- Configurations
- Admin Side
- Courses
- Course Fields
- Course Level
- Course Language
- Lecture Fields
- Earning
- Payouts
- System Errors
- Login & Register
- Messages
- Payment Plans
- Category
- Email Templates
- Reports
- Awards
- Activity Log
- Users
- User Fields
- Instructors
- Students
- Country
- Shortcodes
- Instructor Side
- Courses
- Instructor Dashboard
- My Profile
- Edit Profile
- Instructor Message
- Student Side
- Courses
- Student Dashboard
- My Profile
- Edit Profile
- Student Message
- Course RSS
- Slug
- Update
- Miscellaneous
Clear History
Ticket Detail
Ticket Detail
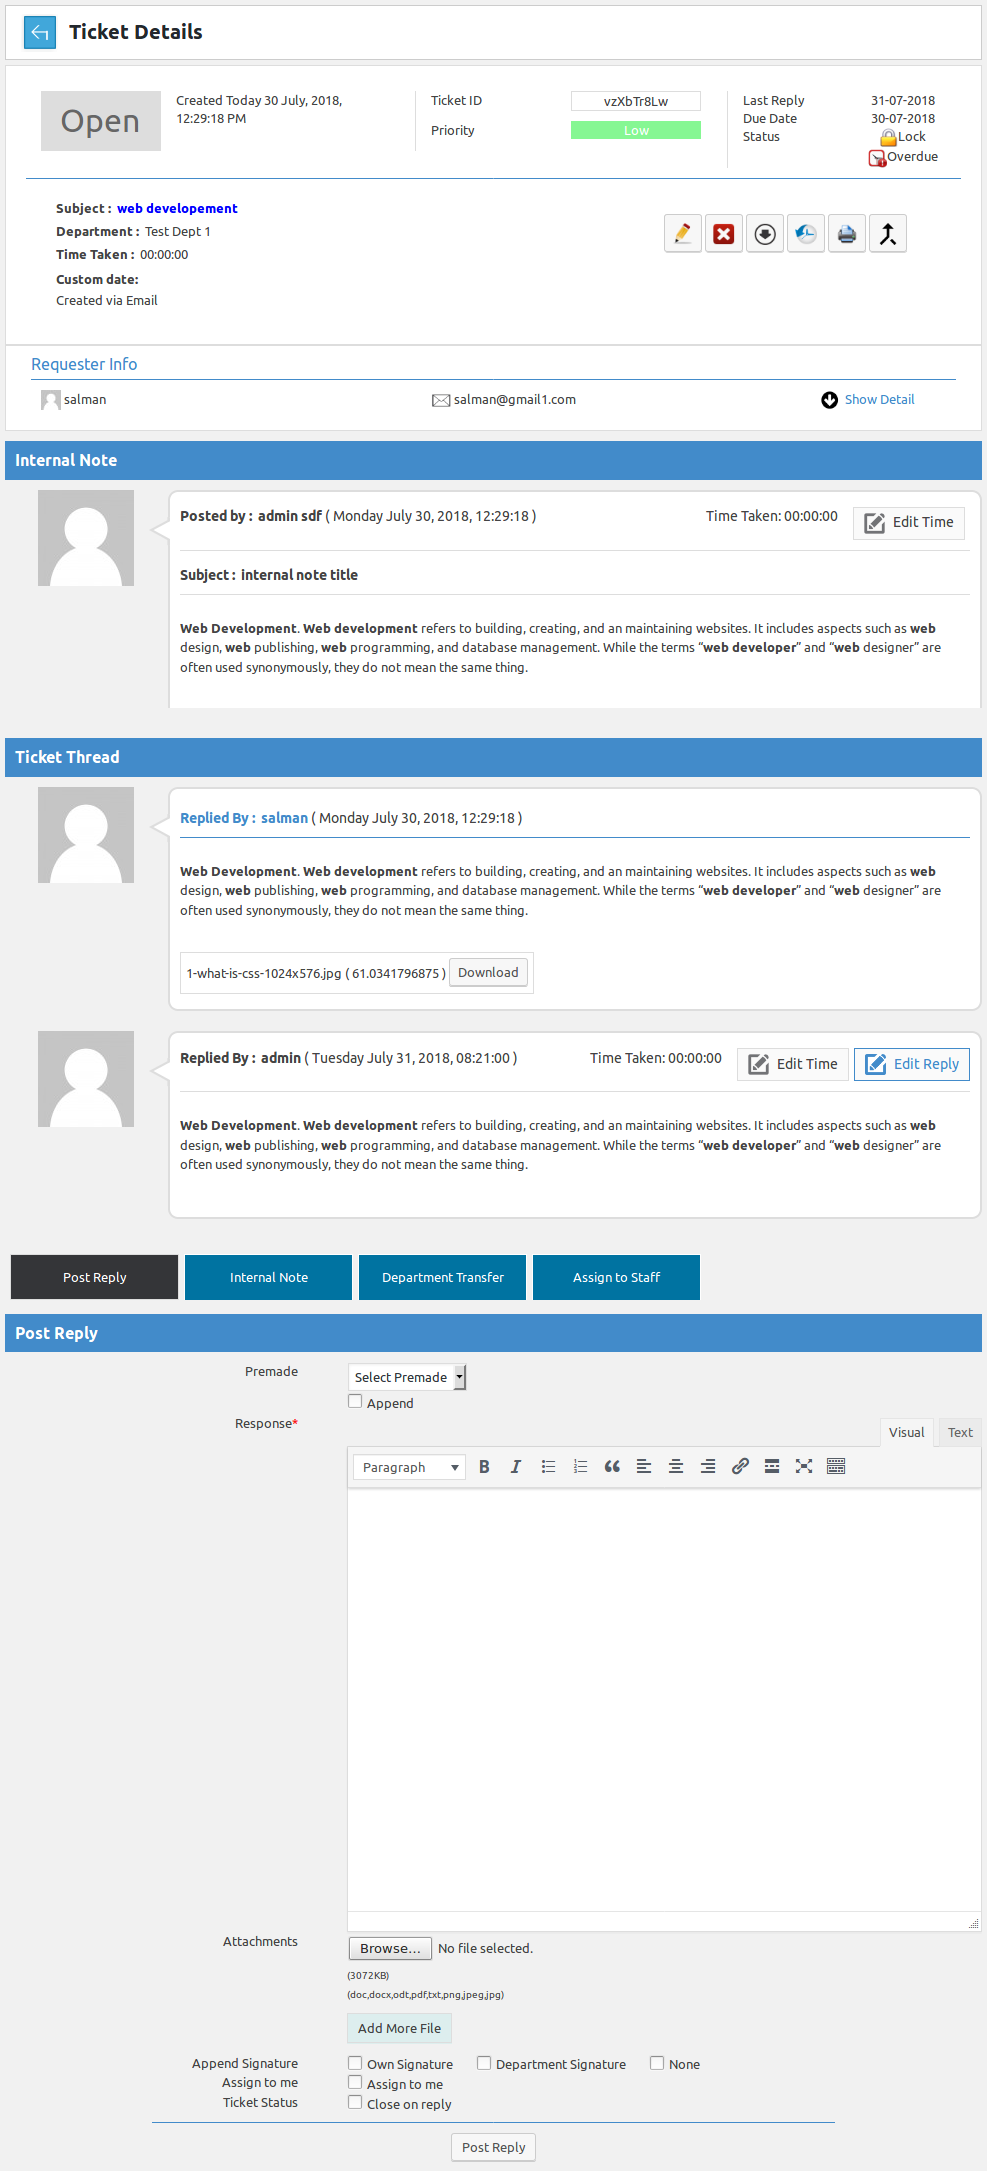
This page provides us details about a ticket. All the attributes (Fields) of a ticket are shown here.Breadcrumbs

Click here to read about the breadcrumb
Ticket Detail

This portion has ticket id, priority, last reply, due date, status, create date and time.
This portion has subject and department of a ticket on the left side. On the right side there are
six buttons close ticket, edit ticket, more options, ticket history, print and merge ticket.
Click on the edit button to edit the ticket.
Click on the more options button you get the more options.
Click on close ticket button to close the ticket.
Click on the ticket history to get a history of the ticket.
Click on the print button takes to print.
Click on the merge ticket button to merge the tickets.
More Option

When you click on the more options button then five buttons are view lock ticket, ban ticket
unmark overdue, make in progress, ban email and close ticket. 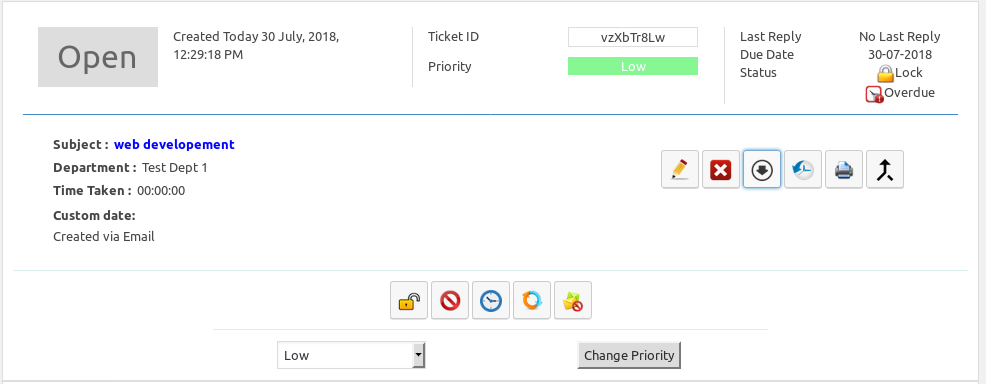
Click on lock ticket admin can lock and unlock the ticket.
Click on ban email admin can ban and unban the email.
Click on the make in progress button admin can make the ticket in progress.
click on mark button ticket will be marked and unmark as overdue.
Click on the ban email and close ticket button admin can close the ticket.
Admin can also change the priority by click on the change priority button.
Merge Ticket
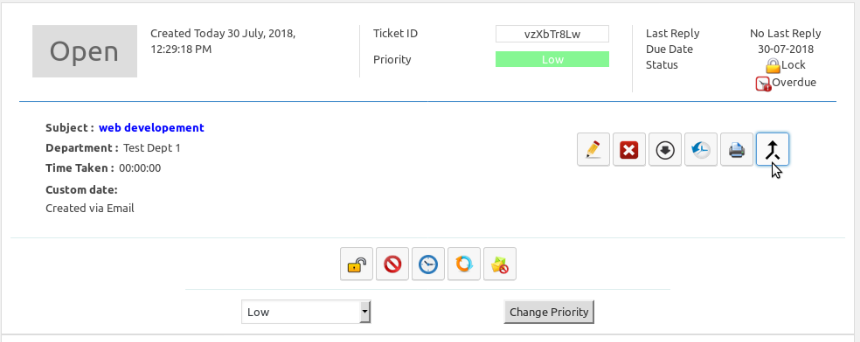
Admin can merge tickets by click on the merge ticket button. Admin can merge all tickets of the
same users, except close tickets.
Merge Ticket Pop-up
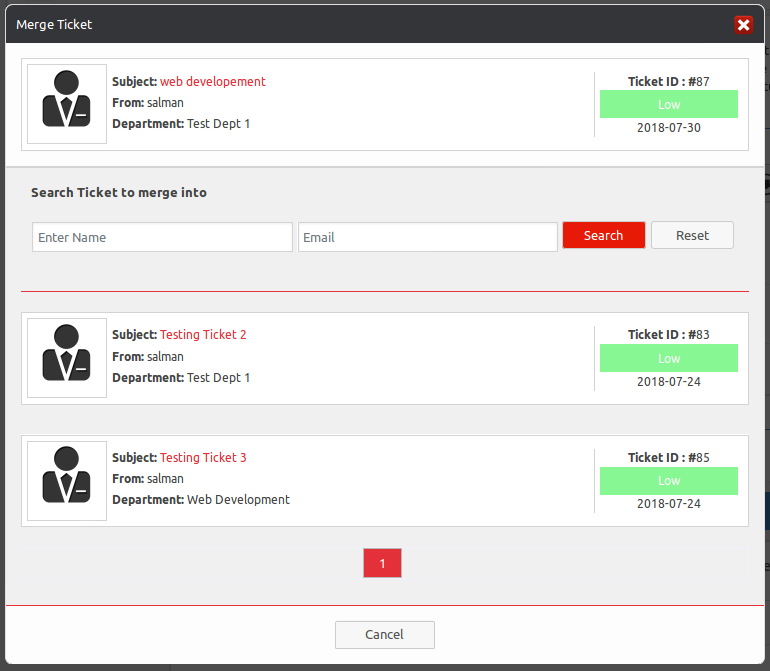
When admin click on the merge ticket button a pop-up will be appear on the screen.Pop-up Header

This portion is a pop-up header, it has a close icon (cross image) on the right side that can be used to
close the pop-up.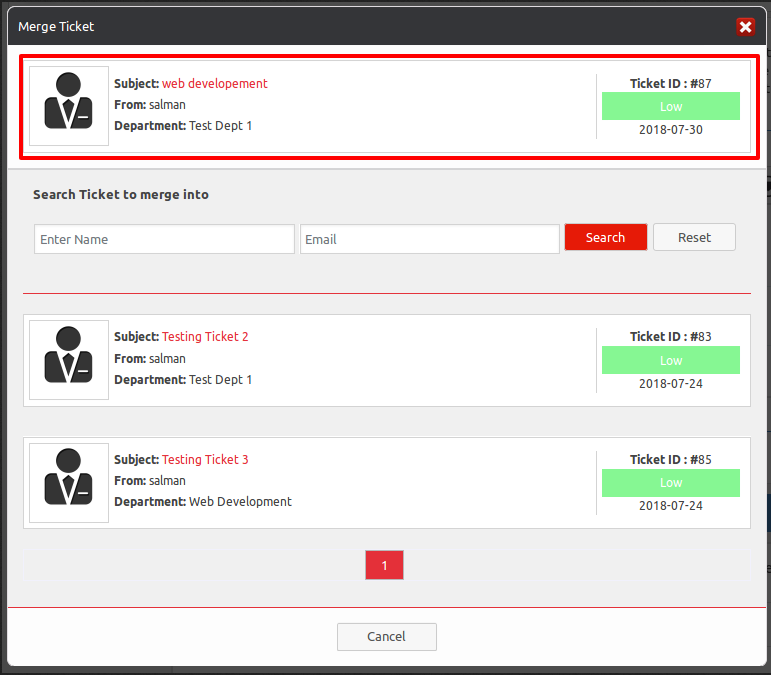
The pop-up shows a highlighted ticket. A ticket which is highlighted with red color is that ticket which you
want to merge with another ticket. This ticket is also known as secondary ticket. This portion represents
subject, from, departments, ticket status, ticket id and created date of a ticket.
Pop-up Search

This portion is filter for a ticket to merge into. It can be used to find tickets for any specific criteria. Admin
filter tickets by subject and email address. After filling the criteria in fields click on search button will
show ticket of that specific criteria reset button will disable the criteria and show all tickets.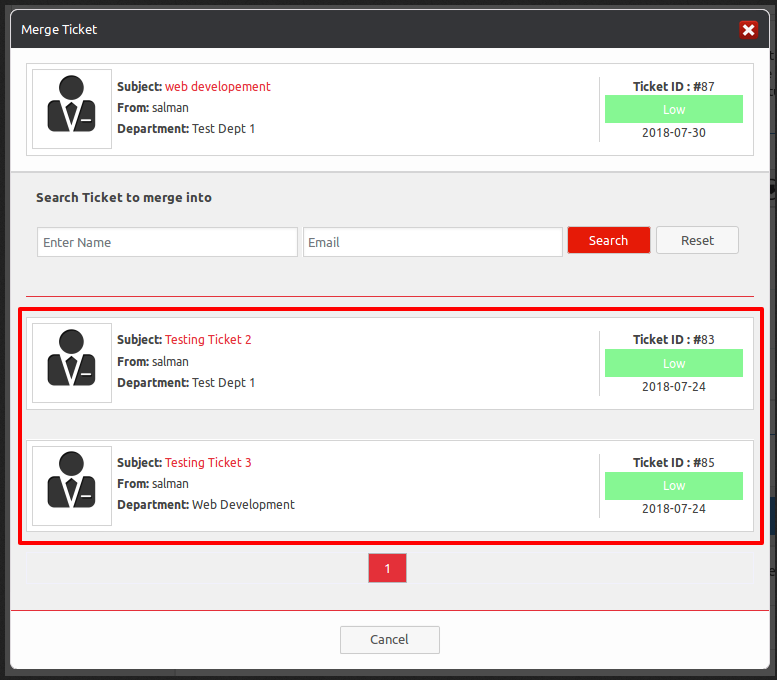
The pop-up shows a highlighted tickets. Tickets which are highlighted with red color are that tickets in which
your (secondary) ticket is merged. These tickets are also known as primary tickets. This portion shows all
tickets of the same user.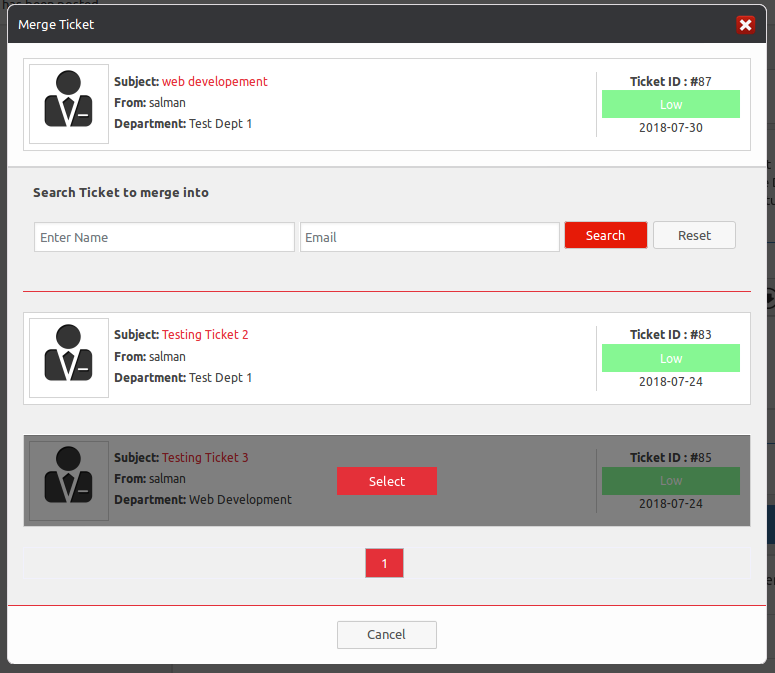
Select button will be shown at hover on a ticket. this portion is used to select the ticket in which your
secondary ticket will be merged.
Pagination

This portion shows the pagination of the pop-up.Cancel Button

This portion shows a cancel button. When admin click on the cancel button pop-up will be closed.pop-Up
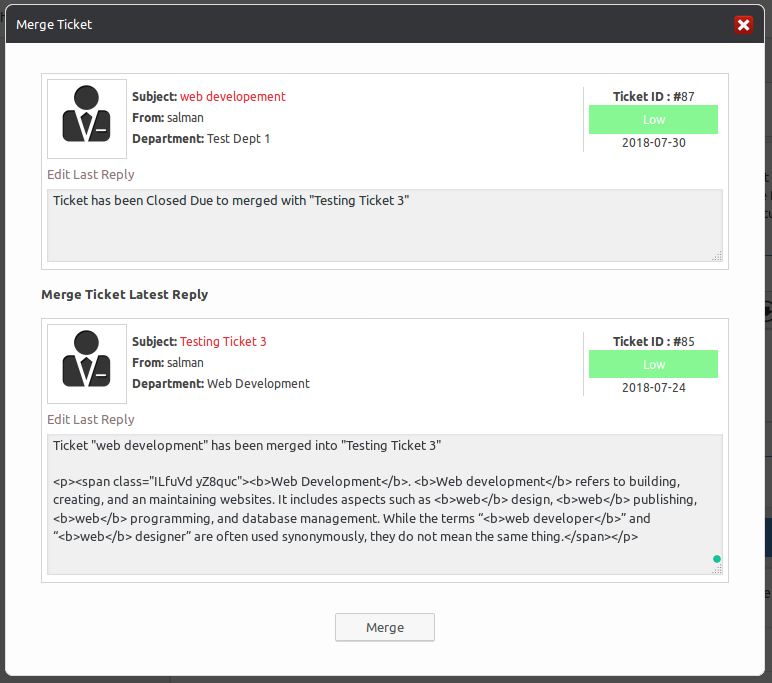
When click on the select button a pop-up will appear on the screen. This portion shows your secondary ticket
will be merged into the selected ticket. Then your selected ticket is also known as primary ticket.
Pop-up Header

This portion is a pop-up header, it has a close icon (cross image) on the right side that can be used to
close the pop-up.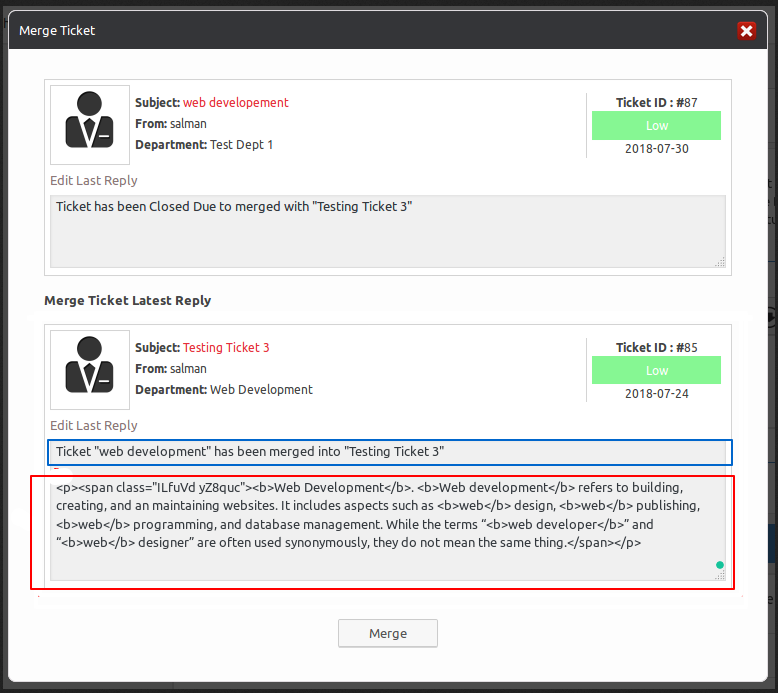
Two tickets are shown in this pop-up. First one is secondary which will be merged into other ticket.
And the second one is primary. Both tickets have default message as a reply. In primary ticket, there
are two message one is highlighted with blue color and other with red color. Blue colored message is
default message and the message which is highlighted with red color is last reply of the ticket which
will be going to merge.
After merging the ticket which you want to be merge, ticket will be closed and no operation will be
performed on it.
Merge Button

This portion shows a merge button. When admin clicks on the merge button, both tickets will be merged.Requester Informations

This portion is requested information it has details about the person who creates the ticket. It has name and email
of the requester. There is a show detail button on the right side.
There is a show detail button on the right side. When click on show detail button then more detail phone, assign to,
and help topic is shown.
Internal Note

This portion contains internal note between admin and staff member regarding this ticket.Edit Time Button

There is an edit time button on the right side of the ticket. When clicking on this button a pop-up
will show you and can edit time by using this button.
Pop-up
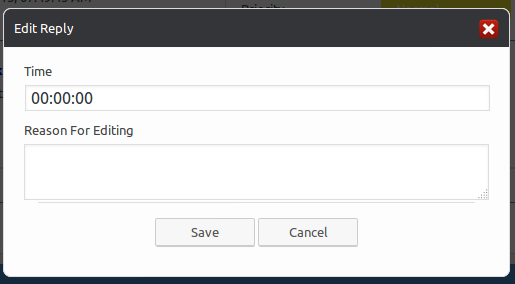
When clicking on the edit time button a pop-up will show you. In this pop-up, there are fields time, reason for editing.
There are two buttons save and cancel.
Pop-up Header

This portion is the header of the pop-up. There is a close button on the right side of the pop-up. When you click on
a close button the pop-up will be closed.
Pop-up Fields

When you click on the edit time a pop-up will show you and can edit the hours, mints, and seconds.
This portion is reason for editing time. In this portion write reason why would you edit the time of the ticket. Pop-up Buttons

This portion view buttons save and cancel. When admin full fill the require fields then click on the save button
the editing will be saved and click on the cancel button pop-up will close.
Ticket Thread
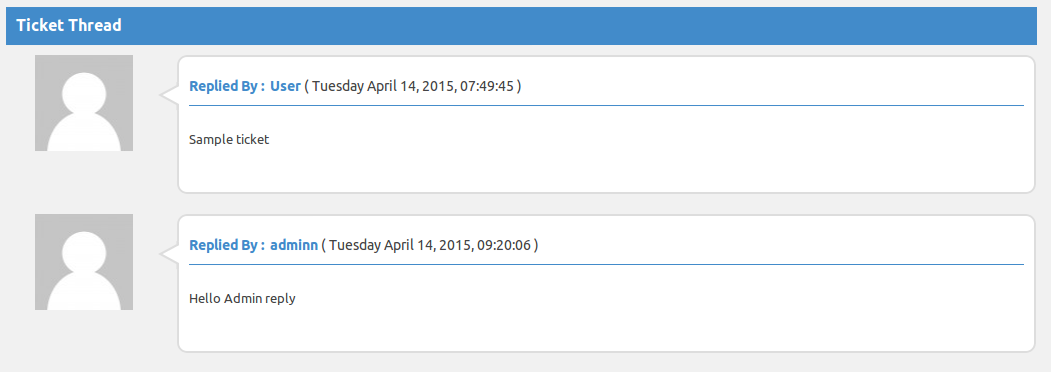
This portion is ticket thread it has the conversation(replies) that has happened between user and admin regarding
this ticket
Top Buttons

There are four buttons which have different functions post reply, internal note, department transfer and
assign to staff. 

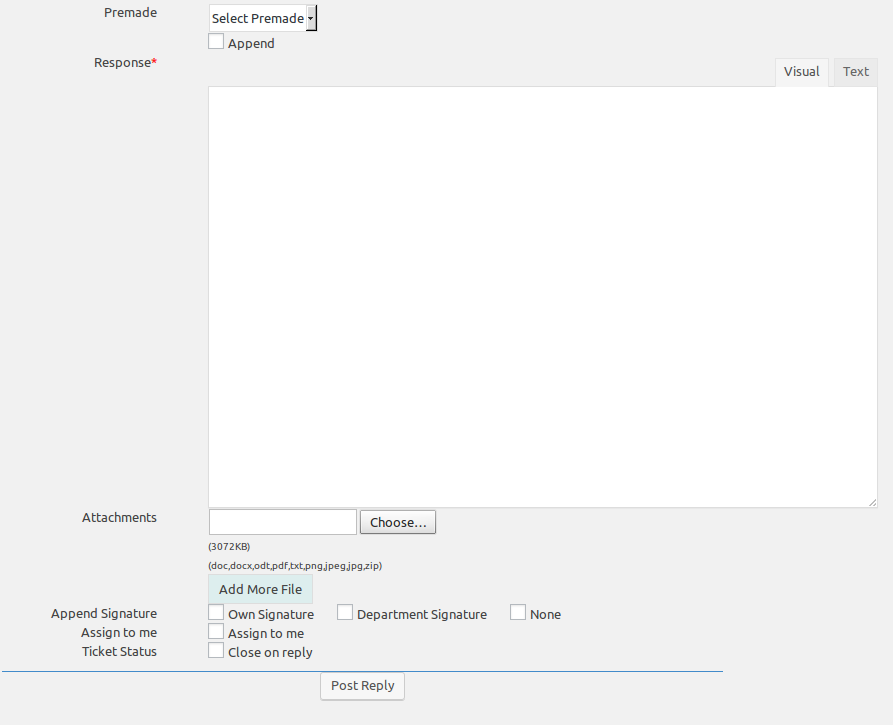
This portion is for a reply, it has a text editor that admin can use to write whatever he wants to say the users.
Admin can add attachments in reply the ticket. There is a post reply button at the bottom of the ticket.

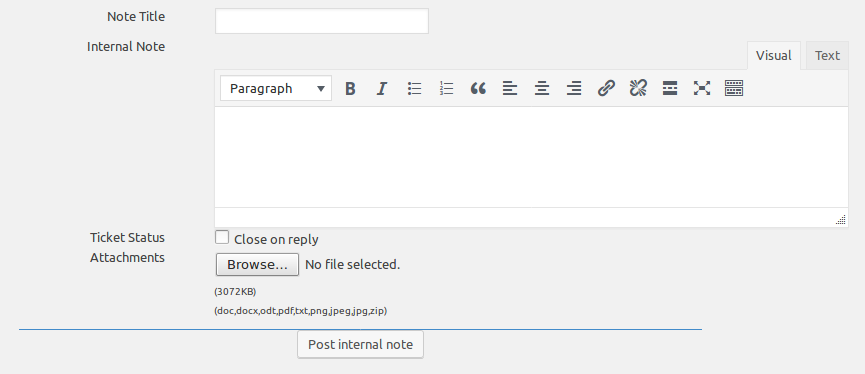
This portion is for internal note, it has an internal note title and has a text editor that admin use to write
whatever he wants to say to a staff member. Admin can add attachments with the internal note. There is a post
internal note button at the bottom of the ticket.


This portion is for department transfer it has a field name and department which we select department and also
has a text editor. In this portion, admin write the reason and click on transfer button to transfer the reason.


This portion is for assign to a staff member it has a field, staff member and also has a text editor, inter note
that admin can use to write whatever he wants to say to the staff member and also have an assign button. When admin
click on the assign button the internal note assign to the selected staff member.
Configurations
Breadcrumbs
Click here to read more...
File Extension
Click here to read more...
File Maximum Size
Click here to read more...
No Of Attachments
Click here to read more...
Ticket Overdue
Click here to read more...
New Ticket Message
Click here to read more...
Ticket Id Sequence
Click here to read more...
User Can Print Ticket
Click here to read more...
Date Formate
Click here to read more...
Found errors? Think you can improve this documentation? Simply click the Edit link at the top of the page, and then the icon on Github to make your changes.